
I know, I know. It’s been a while since I’ve posted. Ever since my kids entered school (over nine years ago now), doing much writing outside of the bare minimum between Halloween and early January has proven difficult. It’s bad enough to have Thanksgiving, Christmas, New Year’s and all four of our birthdays mashed into seven weeks. But when you add all the school-related activities during and after school hours (especially now that our oldest is in high school), it becomes a burden. And when writing becomes a burden, the words get blocked.
Plus, this year I was determined to work on—and finish!—a book-related project that I’d wanted to start on last year and never did. And then, once January rolled around, I wanted to focus on my sequel because I was “this close” to finishing the first draft. I completed said draft last week (yay!), thus I can now focus on a blogpost…
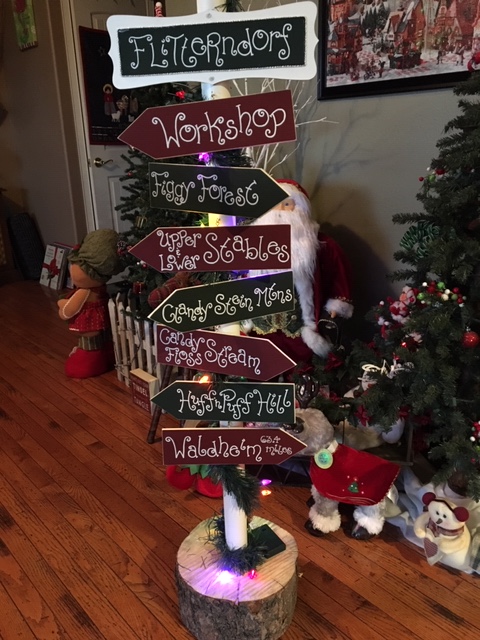
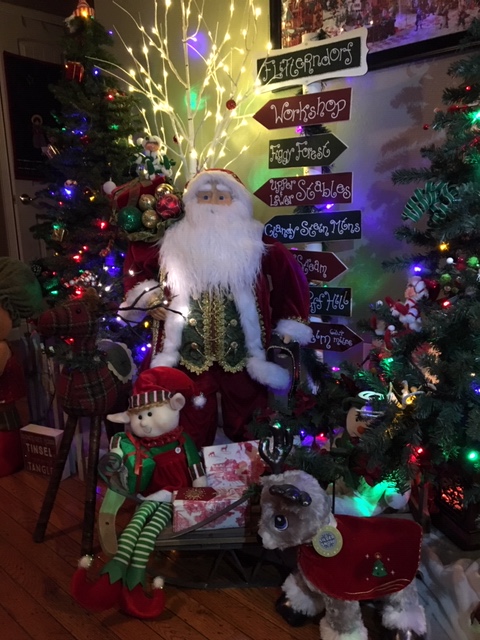
…In which I’m sharing the project I just mentioned. 🙂 So, before we get any closer to Valentine’s Day, here is my North Pole sign post, à la Flitterndorf. (For those who don’t know, Flitterndorf is the name of my village in Tinsel in a Tangle where the elves and Kringles live.)
I created it with storage in mind. In other words, I can remove all place names but the top one from the pole (you can see in the pic that I used cup and eye hooks to hang them) and remove the pole from its base, should I want to pack it away down in my crawl space. But methinks it will hang out somewhere in the house for a long while after the other Christmas decorations are gone. Having it around helps fuel my motivation to continue progress on the sequel. Second draft, here I come!

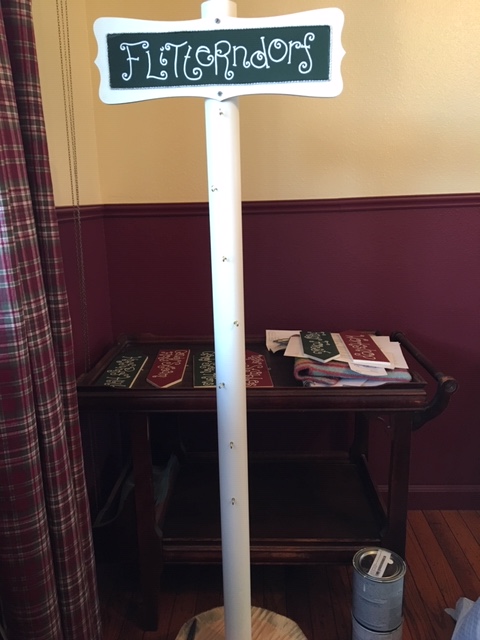
The 12” X 3.25” wooden boards I found at Hobby Lobby. They started out as rectangles until I sheared off the two corners at one end. I found the 4’ pole at Lowe’s, 2” in diameter. And the splice of log for the base came from our own pile of firewood in the backyard (thanks, Hubby!).
I thought I could simply drill a 2” hole in the base and move on to creating the signs, but 1) the 2” drill bit needed for our drill press cost more than we wanted to spend during the holiday season, and then, when I settled for using the 1” drill bit, 2) the log base was too thick to fit between the base of the drill press and the drill bit, and 3) Hubby wasn’t around to help cut the base thinner and I was tired of waiting on this project, so…yeah.
Doing what any other impatient crafter would do, I improvised. Using the 1” bit and my hand-held drill, I drilled out as much of the 2” hole as possible and chiseled out the rest.
Ah, such an easy thing to say—“chisel out the rest.” Not an easy thing to do. 😐
And yet, that wasn’t even the hardest part of the project.
The lettering proved the hardest.
I’d never worked with a paint marker before, so inexperience was against me. And I’m a leftie. Lefties aren’t typically known for our beautiful penmanship, since the lettering system in America is right-hand biased. Thus, the direction of the swirls and the slant of the letters in the font I chose (found on Pinterest) are done in the opposite direction a leftie would naturally choose, if given the option. Which we’re not, so we adapt. 😉
To get the look of the letters just right, I had to first write the words on paper (lots of erasing involved!), then I taped the paper to the piece of wood, and traced the lines with a pencil and heavy hand to make an impression in the wood surface. Once I had a faint outline to follow, I took the paint marker in hand, said a prayer (no joke), and slowly traced my impressions with the marker, working from right to left so my hand didn’t mar the lettering.
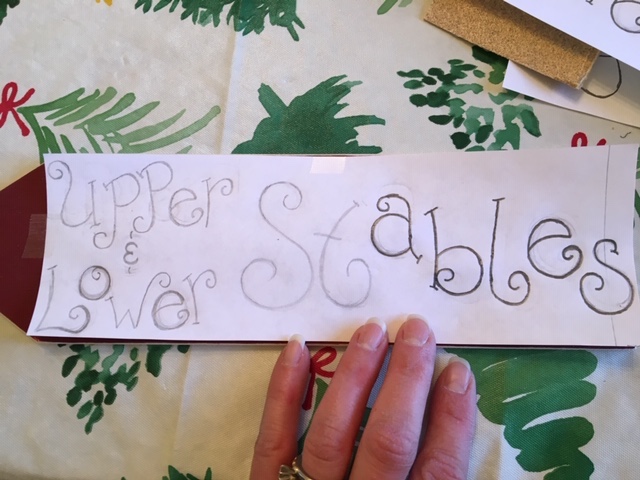
Using a heavy hand to create an impression on the wood. 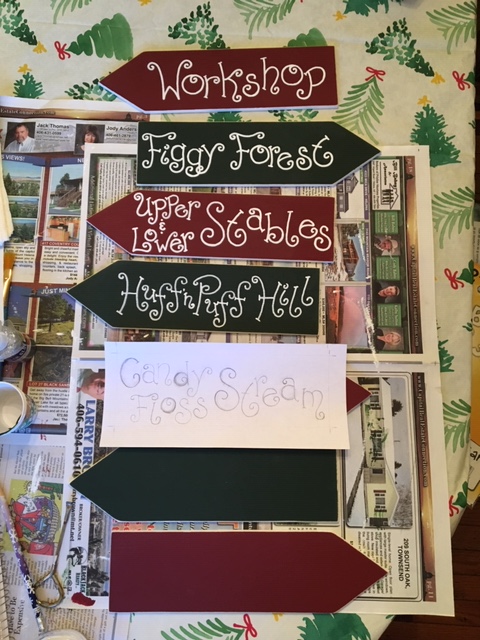
First 3 signs are complete. 4th sign needs another coat of marker paint. About to start 5th sign. 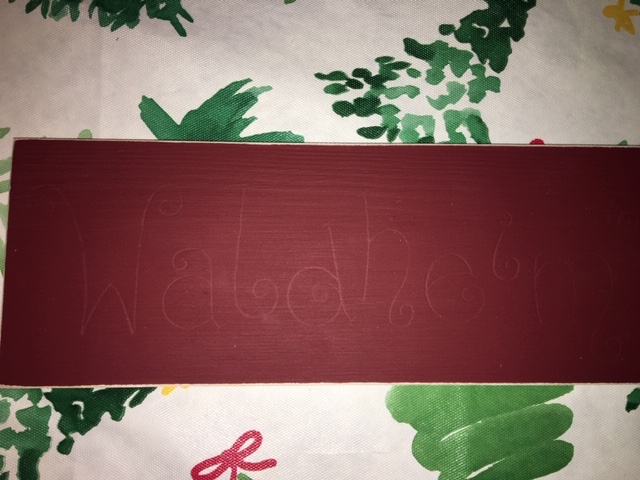
A pic of the impression.
It’s hard to see in the pictures, but I also stapled a length of garland to the pole and draped battery-operated LED lights along the garland. I’m still on the lookout for some wooden ball or small lantern I can attach to the top of the pole, but for this Christmas, I called it good.
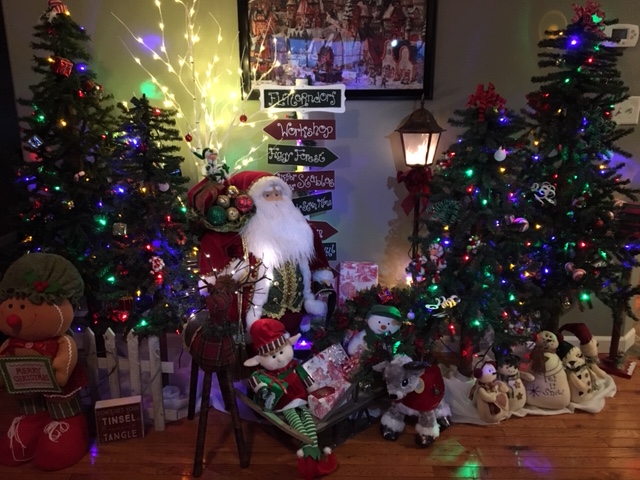
So, there’s my little Flitterndorf flair for the holidays. And if any of you were also crazy enough to tackle a new project in the month of December, I’d love for you to share in the comments! 😀


Laurie,
Given the effort and quality of the signs you produced and displayed today, you would certainly do Santa’s Elves proud!
Dad
LikeLiked by 1 person
I love your creativity and glad you shared how you went about doing this project. It turned out beautiful …including all the snowmen and elves you have been collecting over the years. Glad you thought of storage early on as the sign would be very hard to pack away if it had the signs on in a permanent position. Well done! Jay
LikeLiked by 1 person
It’s adorable! I love it!
LikeLiked by 1 person
Whew! I’m exhausted just reading. :o)
LikeLiked by 1 person
Every truly creative thing takes a great deal of labor, effort and ingenuity. Good job, Laurie.
LikeLike